
Repair a PCB Circuit Board
As the name suggests, a circuit board contains the electrical components that make up a device. They’re found in everything from computers and televisions to vacuums and mobile phones. It’s no surprise that these electronic devices are constantly experiencing damage or failures. The good news is that these circuit boards can be repaired or reconditioned so they can perform as well as new. The key is to figure out what caused the problem in the first place.
Many circuit board problems stem from physical pressure or shock to the device. It can also be due to overheating or aging of the components or the conductive pathways. Luckily, these issues can be fixed fairly easily by using soldering techniques. However, repairing or replacing damaged components can be more difficult and requires more technical knowledge.
The first step to repairing a pcb circuit board is to identify the source of the problem. This can be done by comparing the circuit connections on the defective PCB with the diagrams that were used to build it in the first place. It’s also a good idea to check the different power and ground connections, as well as different signal attributes.
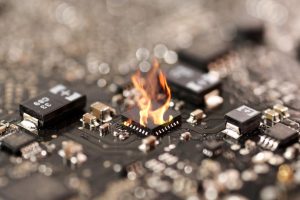
How to Repair a PCB Circuit Board
Once you’ve compared the circuit boards, you should be able to find the source of the problem by looking for a broken trace or solder joint. Usually, these areas will be darker or have an uneven appearance. You can also use tools like a magnifying glass to examine the board for any defects or misplaced components. In addition to visual inspection, it’s important to use tools like a digital multimeter or an oscilloscope to measure voltages or waveforms at the significant test points on the circuit boards.
Typically, most circuit board repairs involve re-plating copper or silver on the conductive paths. These materials may also be re-seated in some cases. These materials are generally the same as those used in the original manufacturing process. It’s important to remember that these procedures can be very dangerous. Those not familiar with these processes should only attempt them under the supervision of a trained professional.
Finally, it’s important to properly prepare the surface of the faulty circuit board before beginning any repairs. This should include cleaning the area with a cotton swab soaked in rubbing alcohol. After that, you can trim any extra tape from the surface to avoid damaging the traces or pads during the repair process. Once the surface is clean, it’s time to place the copper tape. It should cover the entire track and a portion of the surrounding area. Remember that copper tape melts quickly at soldering temperatures, so it’s important to work carefully to reduce the amount of heat that’s applied.
After the copper tape is placed, it’s important to ensure that there are no additional gaps between the track and the surrounding areas of the board. Once the gap is filled, you can then place the new component and solder it in place.


